WELCOME!

Welcome to my Photography, Design, and Everything Else blog. I am a photographer for fun (meaning I don't know too much of what I am doing) and an aspiring graphic design artist. I have always been somewhat interested in photography but really started getting more into it after I had my son. Last Christmas I got my first Sony SLR Camera and the world of photography hasn't been the same since. I still don't know too much but the fact that I can now take some clear pictures works good enough for me. Upon following a few photography blogs I started to realize that even if you don't take a perfect photo, you can create one through photo editing. DUH! I started to become interested and learning new things through video tutorials. This re-sparked a interest I always had for graphic design. I dont have much time to go back to school right now so I have been self-teaching myself as much as I can. Since then I have begun to make flyers, business cards, and magazine ads for the store/dispensery 4ever20. I started this blog as a way to share some of my work with the world and so you can follow along on my learning journey to not only become a better photographer but graphic design artist as well. Along the way I will also be sharing whatever else I think I need to at the time. ENJOY!

Photo Challenge: BLUE

>> Monday, September 28, 2009

So this week's theme over at I♥faces is BLUE. It can represent the emotion of feeling blue but also must have the color strongly featured. I think mine does a good job of representing both.


This picture was taken on one of the first photoshoots I went on upon receiving my SLR camera. And when i say photoshoot it doesnt mean professionally. :) We went hiking and I had just changed my son's diaper and he didnt want to get back in his stroller. His sad face is just absolutely adorable but I'm sure he didn't appreciate mommy whippin out the camera and snapping pictures while he's upset. I immediately thought of this picture because at first I was thinking of portraying the feeling but coincidentally he was wearing blue as well...and we cant forget those beautiful blue eyes.

Click on the sticker below and check out the other entries.


Read more...

4ever20 the store

>> Saturday, September 26, 2009

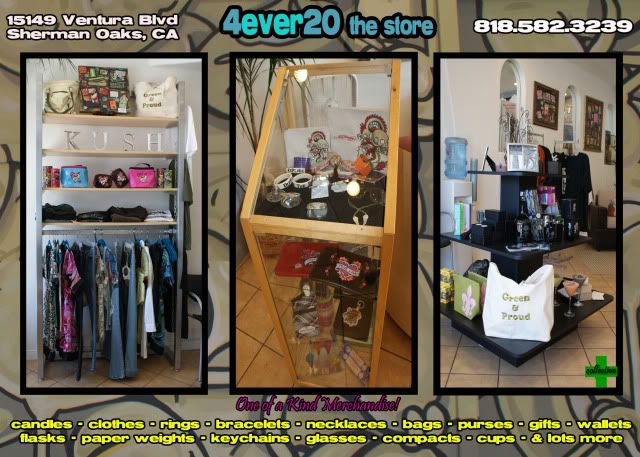
So in the front of 4ever20 there is a store. As you know I get most of my graphic design practice making all the flyers, magazine ads, and business cards for them. In the beginning the front of the store was pretty cool but nothing was getting sold. They decided to get some more things in that people would want to buy and I have to say that things are coming along great. I made another flyer for them but just to promote the front of the store.


This is the front of the flyer. I went to the store and I took some pictures and this creation is from the wall that is painted inside the store. I dont know what those things are but I like to guess worms or bugs of some sort. Obviously smoking and the smoke says 4ever20. I thought it's be cool to put on the front. I like this picture on the flyer becuase it looks it could have been drawn on or for the flyer specifically and not a painting on the wall. My wonderful photo skills. The front picture is the front of the store so customers know what to look or when driving. Inside the store there is lettering across the top that says SUPPORT YOUR LOCAL ARTIST. There are some paintings hung around the store for sale that friends have made. There are also shirts designed by Artist EVAN YORK. Some of the pieces for sale are also made by a friend Michelle [from Lehr & Black] and are available at her online store SHOP LOVE ME. 4ever20 likes to promote upcoming artists/friends in the area.


This is the back of the Flyer. The three pictures of pictures of some of the items being sold in the store. There is some really cute stuff in there so if you live in the area you should visit. You do not have to be a patient of the dispensery to come and shop in the front of the store which is the cool part.

I just noticed the front of the flyer has the address wrong. Luckily this has not been printed and sent out yet so I have time to fix it.

Correct address:
15149 Ventura Blvd, Sherman Oaks CA

Go check it out!

Read more...

Photo of the Week: Sunset

>> Friday, September 25, 2009


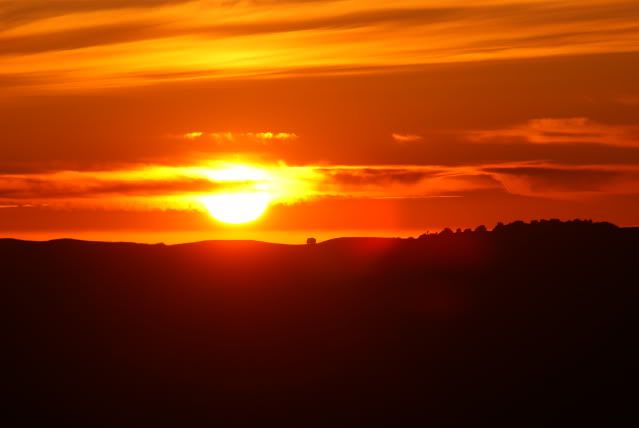
I absolutely love this picture. It was taken the day I went on the photoshoot with my friends to Mt. Diablo in Northern California. Same day the picture of Jessica was taken. It was obviously the end of the day and the sun was going down. We were pretty close to the top of the hill, we made it our mission to get there to take sunset pictures. Well I have this super zoom lens that gets pretty darn close and i though it was be cool to get a closeup of the sun. Well this got close alright. So close I couldnt even look through the lens as I took the picture it was so bright. I love it not only because the size of the sun, but becuase the colors considering it was so close, and the size of the trees and house on the horizen. They seem so small compared to the sun setting behind them.

I have a crazy picture of the moon too. Maybe I'll share that one next time.

Read more...

Learning Lesson #1 : Shutter Speed & Aperture

>> Wednesday, September 23, 2009

As promised I said I would share my photos from photography class with you. Well I have a few friends that got SLR cameras and like me, have no idea how to use them [manually that is] and reading the book doesnt help. Well unlike me, they are unable to take the class like I am right now. SO i figure I'd give little lessons on here. The cool thing is I get to use MY work to teach. yay!

I am taking my class at Los Angeles Valley College and the lessons are taught by Mrs. Nancy Kaye. So everything I learned I learned from her. She deserves the credit. I will try to be as basic as possible yet understandable. hopefully ;)

So the very first thing we talked about in class was EXPOSURE: The Amount of Light Coming Through

Exposure = Shutter Speed + Aperture

Both Shutter Speed and Aperature [aka F-Stop] are what controls the amount of exposure that is coming through the camera.

Shutter Speed: How Long the Shutter Stays OpenWhen you press the button down on the camera the shutter is the "window" that opens to capture your picture. This has to do with light because obviously the longer the shutter stays on the more light is able to pass through the window. The less time the shutter stays open the less light.

Shutter speeds are measured in fractions of a second.
ex: 4000 = 1/4000th of 1 second just as 4 = 1/4th of 1 second.
Now using simple math here 1/4000th of a second is obviously faster then 1/4th of a second so by setting your shutter speed to 4000, the shutter will only stay open for a very short time.

Now creatively the shutter speed controls the Motion of Speed. When I say creatively it means, it all depends on how the photographer wants the picture to come out. If you think about it, if your subject is moving fast and your shutter is opening and closing faster or close to speed then your subject will look clear and frozen. On the other hand if your shutter is opening and closing much slower then the subject is moving then the subject will looked blurred in the photo due to the movement.

The first set of pictures were displaying the use of Shutter Speed. To see this in effect to how shutter speed controls exposure we kept all variables on the camera the same and changed ONLY the shutter speed. The

SUBJECT: MOVING SWING
The swing will becoming more blurred as will the picture become lighter due to the shutter staying open longer in each picture.
Shutter Speed: 250 [1/250th of a second]
Shutter Speed: 125 [1/125th of a second]
Shutter Speed: 60 [1/60th of a second]


Shutter Speed: 30 [1/30th of a second]


The very next thing that effects your exposure is the Aperture (aka F-STOP): Depth of Field [in lamens terms, the size of the hole in the lens].

This smaller the FStop number the Bigger the "hole". Now you can see why this controls the amount of light coming in as well because if the aperture is wide then more light will be able to pass through the lens compared to if it were small.
F2.8 is a wider aperture than F16 and it also lets in more light. Depth of field measures anything in the foreground or background of your subject. Creatively this is important due to what you want to be more In Focus. The wider the aperture the less depth of field you capture which means the more blurred the foreground and background of your subject will be. The smaller aperture means the more depth of field you have means the more clear anything in the foreground or background will be.
The second set of pictures were displaying the use of Aperture and F-stop. To see this in effect to how Fstop controls exposure we kept all variables on the camera the same and changed ONLY the Fstop. The Shutter Speed was kept at 200

SUBJECT: PLANT AND BACKGROUND
In this picture the background (depth of field) will become more clear as will the picture become darker as the aperture gets more narrow. The amount of background blurred in the background also depends on how close you are the subject and how far away the background is. The closer you are to the subject the better difference you will notice.


F5.6

F8


F11


F16


F22

So now after noticing how increasing the length of time of shutter speed makes the picture lighter and increasing the fstop makes the picture darker you can understand better how they work together to balance each other out in order to make a perfectly exposed picture. You have to use both in order to get a good picture. Depending on what you want the picture to look like creatively depends on what the two will be set on.

EX: Let's say you are taking a picture of a flower and you are testing the different exposures to see what looks good to you. Now according to this lighting around your subject, Let say you find a good exposure at 200/F11. Now as far as lighting is concerned this is a good picture BUT you want the background a little more blurred then F11 is giving you. Well since you want to change the depth of field we now know you have to work with the aperture. You want to make it wider which means you want the fstop to go DOWN. Well by the example pictures above you can see that by making the Fstop go down it will make your pictures lighter (b/c the aperture is getting wider thus letting in more light). Well now this will mess up your exposure. SOOOOO since the shutter speed will balance it out you have to change that as well.

LIKE MATH, you want to change the shutter speed the SAME number of "STOPS" as you change the fstop in the opposite direction.
STOP: A FORM OF MEASUREMENT USED IN PHOTOGRAPHY TO DESCRIBE THE CHANGING OF A SHUTTER SPEED OR APERTURE
ex: going from f3.5 to f5.6 is 1 stop. Going from shutter speed 400 to 200 is 1 stop. no matter which direction.

As one lets in more light you want the other to stop more light from coming in. If you change the aperture 2 stops down to F5.6 then you must change the shutter speed 2 stops up to 800 in order to keep the same perfect exposure. The only difference is now your background will be more blurred as you wanted. And you dont have to worry about the shutter speed changing anything because nothing is moving in your picture.

Now what if the subject was a kid swinging on a swing instead of a flower and the perfect exposure was again 250/F11 except this time since he is moving you decide you want the actual subject a little less blurred. This time you want to find the best shutter speed to create the look you are going for. Lets say at shutter speed 1000 gives you a more clear picture. Well by making just the shutter open and close faster (1/1000th of a second compared to 1/250th of a second) then your picture will let in less light then before thus making it darker. Now again you must balance the fstop out to get your perfect exposure back. If you moved the shutter speed 2 stops up to 1000 then you must move the fstop 2 stops down. f5.6 And since the subject is moving and it is the one being blurred or not then you dont have to worry about the fstop changing anything but the exposure.

MORAL OF THE STORY:
SHUTTER SPEED makes the SUBJECT more blurred or not (as long as the subject is moving)
FSTOP makes the BACKGROUND more blurred or not (depending on how close you are)

TOGETHER they can give you the perfect exposure.

until next time, go practice!


Read more...

Photo of the Week: Jessica

>> Friday, September 18, 2009


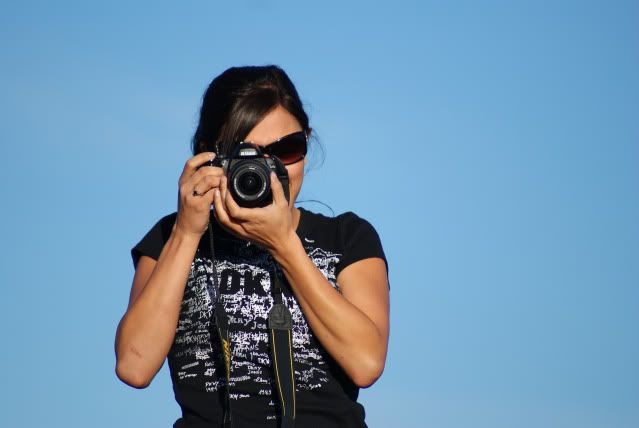
I have always loved this shot since the first time I took it. I always wanted to do something cool to it but could never figure out what since by itself it's pretty awesome. No touch ups no nothing. I think mainly its just the clear blue sky of a background. And the fact we are taking a picture of each other.

This was on the second mini nature photoshoot I went on with two of my other friends. We all had new SLR cameras and wanted to go put them to use. I wish I could see the one she got of me on the other end.

Send it my way Jess.


Read more...

Head Shot

>> Thursday, September 17, 2009

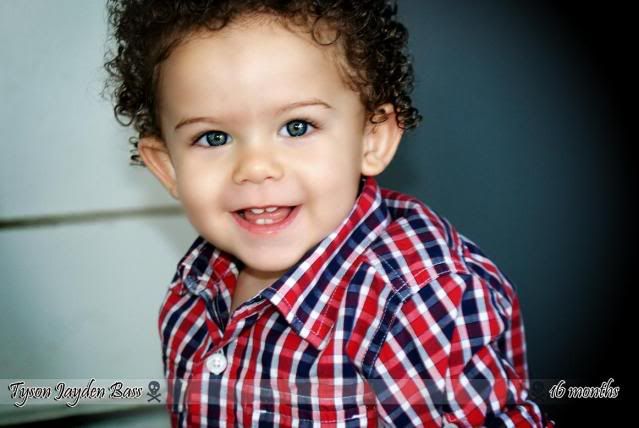
So people have been telling me FOREVER that I need to get my son into modeling. I thought so as well but it just wasnt high on my list. Well randomly the other day I was thinking that maybe I should try to make good use of my camera and try taking some pictures to send it to see how they would come out. Man did I discover photoshops wonders.


So here's my original. SOOC (straight out of camera). Definitely not a bad picture at all but doesnt stand out too much and if I'm gonna send them in I want it to catch someone's eye. Particularly good considering he was crying before this and I couldnt get him to smile at all so happy I caught this while he was happy.


Well I used photoshop to try and enhance his features. Of course I used my favorite "PERFECT PORTRAIT" action from CoffeeShop to soften his skin, bring out his eyes, and give the overall picture just a vibrant color. I added his name to the bottom to give it more of a professional look. To me, this literally looks like it could be a professional type headshot. I mean of course besides that fact that I cut the top of his head off, but I couldnt get him to smile again after this so I had to work with what I had. Now to the printer to print them out and start sending 'em in.

Wish him luck!


Read more...

New Class

>> Wednesday, September 16, 2009

So i started this new photography class. on my way to becoming a professional. haha really i jsut want to know how to operate my SLR camera manually. I mean I thought my pictures on automatic were pretty good until I started seeing other more professional pictures that gave me motivation to learn my camera better. I mean automatic is suppose to do everything for you right? except we forget it can't read your imagination and creativity so if you want a picture to look a specific way..sucks but you gotta create it yourself.

I took a photography class back in 2001 but as I can remember I dont think my camera had many manual settings at the time, it was just a point and shoot, so I dont remember really paying too much attention on all the key points. I think back then too I just thought the dark room was cool and developing pictures. Now that I am older and wise I appreciate the art of photography at its fullest. I'm happy to be able to share my growth with you as well.

My first assignment is due on Tuesday night. I have to take 16 different pictures working with Shutter speed and Aperture. Of course I will post my work so don't beg. :)

Off to shoot.

Read more...

Real Random ;)

>> Tuesday, September 15, 2009

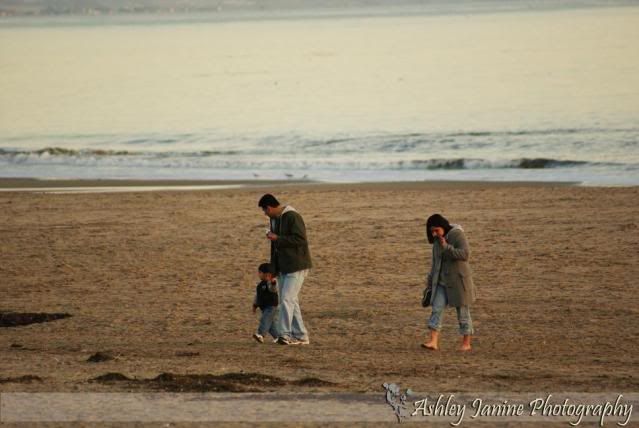
So the same day I went to Santa Cruz, the first day I got to buse my camera, as I mentioned in the previous blog I was taking pictures of any and everything. Well I took this random picture of this family walking back from the water. For some reason I really like this picture. Not only is it completely candid but I would love a picture like this of my family and I just walking on the beach. The only thing I would change would be for the mother to be walking a little closer to the husband and son. [[at least I assume they are a couple]].


Maybe there is a future business idea behind this. hmmmm?

ps: do you like my new watermark I created. After I made the new banner for the blog I decided I need to start branding my pictures. I think it makes the picture look even more professional. what do you think?

Read more...

Photo Challenge: Contemplative

>> Sunday, September 13, 2009


So the Theme this week over at I Heart Faces was "Contemplative".


So I have kinda been waiting for this theme because I love this picture of Justin. This was the very first day I ever used my DSLR camera. It was two days after Christmas and Justin hadn't seen our son and I for about a month [we had previously broken up and I had moved across the state]. We took a family trip to Santa Cruz Beach Boardwalk. I was sooo excited about my camera that I was taking pictures of any and everything. We had always discussed moving back in together and before this picture I had made the decision to move back to LA in a few months [i moved back in March of '09]and although I don't know what Justin was thinking, I imagine he was thinking about being back in each other's lives.

As you can see by the none clarity of the picture, I didn't know how to use my camera very well [still dont--i finally start my photography class on Tuesday] but I still like the light circle around him and one of the reasons I loved this camera versus my digital cameras in the past is I love how it blurs the background. I'm not too good with photoshop yet, as far as just instinctly knowing what to do to make a picture look awesome but after hours of doing and re-doing this picture, I had to make myself just be fine with this final product!!!

Catch some more entries over at http://www.iheartfaces.com/


Read more...

Kush La Ad

Here is an example of a magazine ad I made for my teh store 4ever20 that will be in the September edition of KUSH LA magazine. It is a medical marijuana dispensary in Sherman Oaks. Where my graphic design skills come to life. I didn't know too much about graphic design before the store opened. I started learning stuff on photoshop shortly before they opened and was since then disgnated artist for the store as far as ads and stuff go. I mean it's free for them [for now] so of course they'd use me. And I get to start creating a portfolio with my work. Let me just say, it is so rewarding to see something I made into flyers that are being passed out, or IN A MAGAZINE [[even if the magazine is only seen by pot lovers]]. They even used something I made as a sticker for the store window and the sign hanging above the shop. It's really neat. Since then I have been asked by my friend to make flyers for the company she works for and my friend has bragged about me to others to make their ads for magazines. Hopefully I'll get to start making money off of all of this soon which is obviously my goal. Gotta learn a lot more so I can get faster at it now. Man the computer needs to start paying me for all the attention I give it. :)


Read more...

Fix it Friday: Angel Eyes

>> Friday, September 11, 2009

So being that today is Friday there was a Fix-It-Friday over at I Heart Faces. It is a picture of a precious little girl named Addie.

BEFORE.
When I saw the Before picture I immediately was focused on her gorgeous eyes. I knew I had to make them stand out and that would be the focus point.


AFTER.


I created a new layer and selected her eyes and changed the curve balance slightly up on the RGB and the B and G seperately. This alone gave her eyes this stunning crystal blue look. I also changed the brightness/contrast a little. I then flattened the image and used the healing brush tool on her cheek and under her eyes a little. I guess she had a black eye in this picture according to the blog but you could hardly tell. I then used the "Picture Perfect" action [my FAVORITE if u can't tell] to soften her skin a little and color pop her eyes. The action also made her skin lighter and brighter.

This picture was not named and after I edited it I thought she looked like a little angel so I named it angel eyes myself. I just love her crystal eyes.

Head on over to I Heart Faces and check out all of the other contributions.

Read more...

Photo of the Week: Jayden

This is a picture of my friend's daughter Jayden. She is almost two years old. I think she is just absolutely adorable. This is the very first time I got to see her in person. My friend lives in San Diego and I recently was living in Northern California so I never got to see her. Only pictures online which she never updated often. She looks just like my friend did when she was a little girl, except Jayden has these beautiful green eyes.

I took this picture in my friends backyard. Jayden was probably annoyed with me because I kept following her around with my camera. This picture is one of my favorties of her. Just so innocent looking.

I used the action "Perfect Portrait" from CoffeeShop to soften her skin adn bring out her eyes and of course write her name down the side. If you click on the picture you can enlarge it and see it better.


Read more...
Related Posts with Thumbnails