WELCOME!

Welcome to my Photography, Design, and Everything Else blog. I am a photographer for fun (meaning I don't know too much of what I am doing) and an aspiring graphic design artist. I have always been somewhat interested in photography but really started getting more into it after I had my son. Last Christmas I got my first Sony SLR Camera and the world of photography hasn't been the same since. I still don't know too much but the fact that I can now take some clear pictures works good enough for me. Upon following a few photography blogs I started to realize that even if you don't take a perfect photo, you can create one through photo editing. DUH! I started to become interested and learning new things through video tutorials. This re-sparked a interest I always had for graphic design. I dont have much time to go back to school right now so I have been self-teaching myself as much as I can. Since then I have begun to make flyers, business cards, and magazine ads for the store/dispensery 4ever20. I started this blog as a way to share some of my work with the world and so you can follow along on my learning journey to not only become a better photographer but graphic design artist as well. Along the way I will also be sharing whatever else I think I need to at the time. ENJOY!

Photo Challenge: Pets

>> Monday, December 14, 2009


This weeks challenge over at I ♥ faces was "pets". This is a picture of my cat Charlie. Before I learned how to use my camera I could never get a good picture of him bc the flash would always make his eyes close. This time I didnt use a flash but the shutter speed had to be so slow I had to sit my camera on the floor. made for a pretty cool picture.

Go on and visit www.iheartfaces.com and check out the other entries this week.

Read more...

MORE HOLIDAY CARD DESIGNS

>> Thursday, December 3, 2009

Below are more examples of what I do and variety of different types of cards I can make. It can include as many pictures as you want. As mentioned in the previous post I can design something completely original or I can duplicate something online and just add a little more personal touch. If byou do like anything below I can change whatever it is you want changed (colors, size, pictures, font, etc) If you see something you like or are interested please CLICK HERE to check out pricing and contact info.

Click each picture to see a larger version.


CONTACT INFO: LEAVE A COMMENT OR EMAIL ASHMOMMY2009@HOTMAIL.COM
Please remember to leave your contact info


I AM STILL LOOKING FOR THE FIRST 5 PEOPLE TO WIN A FREE DESIGN!!!
I have already given out all my free designs. Thank you. Still taking offers for paid work.

Read more...

Holiday Cards

>> Wednesday, December 2, 2009


I made designed this holiday card for a friend and actually like it a lot so decided to put it out there in case anyone is interested in getting a card personally designed by yours truely. The first 5 people that are interested, I will design for a card for free after that there will be a charge.

There are two ways to go about it... I can design the card for you and actually get them printed myself and send them to you OR I could send you the design via email and you can get them printed wherever you choose. If you are one of the first 5 that request a card then you will get the design sent to you via email. All I need form you is picture(s) you want on the card if any.

Pricing Details:

I will be charging cheaper then most online websites and prices vary depending on how many pictures you would like to use in the card, designs, size, etc.

If you want me to send them to you myself the pricing will be as follows: (minimum of 10)

10 cards - $1.25 each = $12.50
15 cards - $1.15 each = $17.75
20 cards - $1.05 each = $21.00
25 cards - $1 each = $25.00
30 cards - $1 each = $30.00
35 cards - $1 each = $35.00
40 cards - $1 each = $40.00
45 cards - $1 each = $45.00
50 cards - 70 cards - $0.93 each = $46.50 - $65.10

Anything more then 70 cards let me know and I will tell you pricing

Envelopes will be charged $.10 each

Shipping and Handling (2-3 days delivery) $5.00

* If you would like me to personally mail them to the recipients for you it will $0.44 per stamp and $0.35 per envelope for address (recipient and return address)
* This way saves you shipping and handling and time bc they will go straight to the recipient.

EXAPMPLE:

$45.00 45 Cards
$4.50 Envelopes
$5.00 Shipping & Handling
_______
$54.50 total

compared to Tinyprints.com

$82.80 45 cards
$0.00 envelopes included
$5.00 Shipping & Handling
_______
$87.80 total

Savings of $33.30 for the same card!!!

All cards will be printed on glossy or luster paper.

If you want me to send the card via email and you can print them yourself it will be a flat fee of $20 per design (prices can vary depending on size, design, number of pictures etc.)

I will either custom design my own card or I can duplicate a card you see online. Pricing can vary


CONTACT INFO:

LEAVE A COMMENT OR EMAIL ME AT: ASHMOMMY2008@HOTMAIL.COM


This is not limited to Holiday Cards... I can design baby announcements and invitations as well.


Example Birth Announcement:


Read more...

Photo of the Week: The Big Red Barn

>> Friday, November 20, 2009


Once again a picture from teh first day I got my camera. Seems I took pretty good pictures back then when I was still working the automatic mode. I was in the passenger seat of a car when I got this shot. Love it because you can see the movement in the grass yet the barn looks pretty clear. This was shot in my hometown of Pleasanton, Ca. You from there know exactly where it is!

Read more...

Perfectly Flawed

>> Wednesday, November 18, 2009


By its very nature the beautiful is isolated from everything else.

Read more...

Eye c u

>> Monday, November 16, 2009

"ALL OUR SOULS ARE WRITTEN IN OUR EYES"

Read more...

Learning Lesson #2: ISO

>> Saturday, November 14, 2009

Soooo I know I was supposed to be doing my learning Lessons upon learning them myself but it started to get a little more complicated and I thought I'd have a hard time explaining the next step in using your camera to take good exposed pictures. BUT I am finally here willing to give it a try.

SOOOO shall we begin:

ISO: Film Sensitivity.

So far we have discussed how Aperture and Shutter speed make up the exposure using the amount of light they allow into the camera. ISO is the next function that can affect light as well. Not in a way in which it allows more or less light in but how sensitive the light being let in shows. ISO ranges usually from 100 to 3200 on most digital cameras. Each one doubled from the previous. The lower ISO is used for lighter setting while the higher ISO is used for darker settings. (Example: You will use a lower ISO outside on a sunny day then you would inside a dim lit room.) This is because the higher the ISO makes the light more sensitive thus creating almost a delusion as if more light is being let into the camera., when in fact the light just looks brighter.

If you are taking pictures outside and its nice lighting then usually you'll keep your camera on 100 or 200 ISO. When shooting inside or in darker settings then you'll start to change your ISO around depending on what works best for your situation.

If you remember in the previous post we talked about STOPS and changing the aperature and/or shutter speed in order to keep an equilvilent exposure but change either the depth of field or motion blur. Depending on what you wanted to do creatively, you had to change BOTH teh same number of stops in order to keep a good exposure. When you throw ISO into the mix it is a little bit different. If you are going to change the ISO by one stop then you will change ONE of the other two functions by one stop as well. Either the shutter speed OR the aperture. Changing both shuttter speed and aperture with ISO just keeps everything equivilant and you dont want to do that considering changing the ISO doesnt really do anything to the picture creatively. You usually only change it to affect your lighting somehow which means you want to see the specific change.

ISO is one of those functions you where you can decide before shooting which would probably work best and you'd most likely leave it at that setting throughout your shoot because you can ideally use just aperture and shutter speed to create a good exposure. When people use film they have to buy the film already ISO specific which means they have no choice to change the ISO or not. If they buy ISO 100 film then that is what their ISO will be until they are done with that film.
There are cases though in which you will changed your ISO during the shoot and it is when you can not change your aperture AND shutter speed in order to create a good exposure. These cases is because you have reached your minimum or maximum setting and/or cant change them depending on the creative look you're going for.

EX: Most lenses that comes with the camera have a maximum aperture of F3.5 which means that is the widest the lens opens and the lowest F-stop it can reach. Well lets say you want a picture with a blurry background (wide aperture) and you are at F3.5 and a shutter speed of 60 (1/60th of a second), ISO 100 and your picture is still too dark. You need MORE light in to get a good exposure. Well you could lower your shutter speed one stop to 30 but usually around this stop is when its almost impossible to hold your hand still enough so your picture doesnt come out blurry. Remember, When your shutter is open for that long, if you move your hand then the picture will come out blurry because you moved while the picture was still taking. SO anyways, you want to keep your shutter speed at 60 and you cant open your aperture anymore....what could you do to get a lighter picture?

You could change your ISO one stop up. If you change just your ISO to 200 then that makes the light more sensitve otherwise making it seem like more light is coming in and can give you the exposure you were looking for. This is example is one reason you;d change the ISO because both other functions were at their max or min and your exposure was still off.

Now let's say you already have a good exposure but you just dont want to change one of of the functions of shutter speed or aperture bc of what you are trying to do creatively. Let's say you are trying to capture a picture someone running and you want the action frozen, so not blurry. Well you found a good exposure at F8, shutter speed 250, ISO 100. Well 250 doesnt seem to be fast enough to freeze the action so you need to move it up 3 stops to 2000. Since it's faster this is letting in less light. Well remember when you move one stop UP the other must go DOWN to balance out the light. Well your camera aperture can only go down 2 stops to F3.5...what do you do now?

You can leave your Aperture at F8 and change the shutter speed still to 2000 but now change your ISO from 100 UP 2 stops to 400. This compensates for not moving the Fstop and allows more light in.

ISO takes the place of one or the other
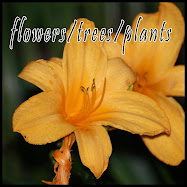
PHOTOGRAPHIC EXAMPLE: TREE
This is bracketing the ISO...meaning just changing the ISO and leaving everything else the same in order to see the effect the ISO makes.
Good Exposure: F4.5 SS 500 ISO 100

F4.5 SS 500 ISO 200

F4.5 SS 500 ISO 400


F4.5 SS 500 ISO 800


The light in the pictures gets more sensitive as the ISO goes up. In order to keep the good exposure in each picture you'd change eith the Fstop OR the Shutter Speed the same number of stops.

One important thing about ISO is that if you make it too high the picture starts to look more grainy. So be careful.

One more example to take it home:

Bert and Ernie are both using their cameras but Burt wants to keep his ISO at 100 while Ernie wants to keep his ISO at 200.

Well the perfect exposure for Bert is ISO 100 F5.6 and SS 500. What are two different ways Ernie can reach the same good exposure without changing his ISO?

Option 1: Keep the F stop the same but change the Shutter speed. Since ISO 200 is only 1 stop UP from ISO 100 (letting in more light) then he would only change the shutter speed 1 stop Down to let in less light to balance it.
ISO 200 F.5.6 SS 1000

Option 2: Keep the shutter speed the same and change the Fstop. Again since the ISO 200 is only 1 stop UP from ISO 100 (letting in more light) then he would change the Fstop DOWN letting in less light to balance it out.
ISO 200 F.8 SS500

It's always like math. You want the balance of light. Not too under or over exposed. If you change one funtion of how light comes in you must change another to keep the balance.

Basically to keep it simple try top choose your ISO before shooting and ONLY change it when you have no other options.


Read more...

My 20's Man

>> Tuesday, November 3, 2009


So I haven't been blogging much lately. I have been trying to get my other blog ready for the one year birthday & 100th post. Which is today by the way. Happy Birthday to THE TYSON TIMES! I will promise to try and be better. How can I expect my blog to start thriving If I can't keep up with it. I gotta start going out there and taking more pictures too. Definitely a must!!! Well I had a mini photoshoot with my son recently. I put him in this adorable outfit and after many attempts inside the house where he just would not sit still for me, we moved outside where I got some AWESOME shots. He reminded me a little 20's man waiting for his wife to come home. AWW how adorable it would have been if we had a little girl by his side. maybe i can find one for next time.

Outside was perfect because he was a little out of comfort zone so he was able to follow direction more [well as much as an 18 month old could] and able to sit still for longer periods of time. Here are a few of the shots i got. As you can tell my photoshop skills are getting better as well.


aww my little baby is growing up!


Read more...

Fix it Friday: INNOCENCE

>> Friday, October 30, 2009

BEFORE: AFTER:


here is my fix-it-friday entry for this week. I am actually quite proud of it. I like it a lot. :)

Let's see, first i did some touch ups and fixed the bruises on the girls legs. Of course little kids alwyas bumping into things. Next I used the perfect portrait [those who know me know its my favorite] from CoffeeShop. This allowed me to soften teh skin adn brighten the eyes and clothes. After I did this I took out the background and added in a shaded layer of pink to black. I think Put a textured flower layer over it and lowered the opacity so you could see the shaded layer below it. Then added the INNOCENCE text to it and voila. the final product.

getting quite good at these.


Read more...

Photo of the Week: Grandma Stacey & Tyson


a picture I caught while doing a mini photoshoot with Tyson of him and his grandma Stacey. I didnt really have many pictures of them together so glad this one came out so nicely. I was shooting Tyson and Grandma was walking up behind me and as soon as he saw her his eyes lit up and he went for the hug. This picture is just beautiful. Time to make a scrapbook page with it now. :)


Read more...

First [kinda] real shoot [with people]

>> Wednesday, October 28, 2009

So a friend of a friend is starting this online clothing boutique called House of Plum Red. She had a photoshoot last weekend for her website so she can get started and get the site up and running. Well she needed assistance with the photography and I, very willing and anxious to learn more, of course volunteered. I warned her though that I am far from professional and I know not much more then shutter speed and aperture. She was still willing to have me help. So nice! Well days before the shoot the photographer cancelled and i was SUPER worried that I was going to be the only one but then as God has been helping her, she got a new photographer. ::whew:: because we know id dint want to responsible for messing anything up. So once again I was assisting. yay.

Well when I arrived I really wasn't too sure exactly what I would be doing. Thinking to myself "what did I get myself into, I really know nothing about photography just yet, i only take pictures of plants...". Well most importantly I knew nothing about lighting, esp indoors. my class had just begun that process and then it was over. poor me. i get inside and see the inside of the house setup to shoot with all the professional lighting set up and the nice camera and stuff and then i really felt out of place. well immediately i was welcomed and introduced to the real photographer, Andrew Lee, who was VERY nice and assured that I could learn some from him. He started asking me questions and i had NO IDEA what he saying at certain times yet just as eager to continue learning. I was to at the least take some "behind the scenes" pics of all the girls and stuff. This made me breathe a little easier as I knew my pictures weren't going to be near as good as the real photographers considering I then noticed how lighting is such a big deal esp when shooting fashion and indoors.


I started taking pictures of the girls getting their hair/makeup done and the clothes and preparation. I wanted so badly to be able to shoot the actual girls so while they were shooting for Andrew I stood afar and shot them myself. Hoping that with some good editing, my work could still be seen. I got a few good shots but quickly saw myself how lighting makes all the difference in the world. GOOD thing i wasn't the only photographer there. The only thing I noticed I needed more help with as far as being the "behind the scenes" photographer was that I need to be more assertive and confident. I was kinda shy being that I had never shot people before [besides my son] and I although I got some great shots I'm sure I could have gotten more if I would have spoken up a little more and talked to the models more about taking pictures for me. I could have even grabbed them aside to do a mini photoshoot with me. Andrew assured me that this part was indeed the hardest obstacle when shooting people for a first and you need to realize that they are people and you just have to tell them what you're here to do. Maybe next time I can do that.


I learned a lot from being at the photoshoot. Everything was so professional. There were people doing hair and makeup. A stylist to help put together outfits, runners to help on the side with little things, and wonderful models to work with. I was glad it was someone I sorta knew and I definitely felt more at ease. In t he end Andrew asked me for my contact info and said that he would contact me if I were ever interested in assisting him in the future which of course would be ideal for me. I'm determined to l earn more before then though. Maybe get some better equipment to help me out. I quickly realized how serious I need to take this work if I really want to do something with it on the side, if not full time. I need to put my heart and soul into it and dedication. I was only doing this on the SIDE SIDE SIDE, so far meaning that "when I had time" but i realized I have potential to really be good and make some decent money, I just have to learn all I can and invest in some better equipment. Seeing how professional Andrew was made me strive to be as good.


Hope you enjoy some of my work. I didn't share too many of the behind the scenes pics I took. These are the mostly shots I caught from afar. Thank god for zoom lens right.... and photoshop. The quality of mine weren't nearly as good ad Andrew's but photoshop gave them a little justice.
Hope you enjoy and keep a look out for HOUSE OF PLUM RED opening sometime mid November 2009. The clothing is awesome.
I'm suppose to be helping again this Sunday but depending on my daycare schedule it might not happen. Wish me luck. I'd love to shoot with these ladies again.


Read more...
Related Posts with Thumbnails